 Video Tutorial: Design and export HTML Email Signatures from Figma
Export your HTML signature from Emailify
In the Emailify plugin, click on the Export HTML button to open the export panel, select the HTML Email Signature option from the dropdown list, then click the Export to HTML Signature button to start exporting the emails you've selected from Figma to HTML.
After Emailify has finished processing your email(s), you'll be shown a confirmation message; you can download your .zip file to your computer by clicking the Download your .zip file button, then you can unzip the .zip to see your exported files.
Copy your HTML email signature to the clipboard
After you've exported your HTML email signature from Emailify and unzipped the .zip file, you can open the preview-and-install.html file in your Google Chrome web browser (as other browsers like Safari may have issues) and then click the Copy HTML Signature button on the preview page, which will automatically copy the contents of your HTML signature to your clipboard.
How to install your HTML email signature in Mozilla Thunderbird (Windows)

- Download your signature as a HTML file.
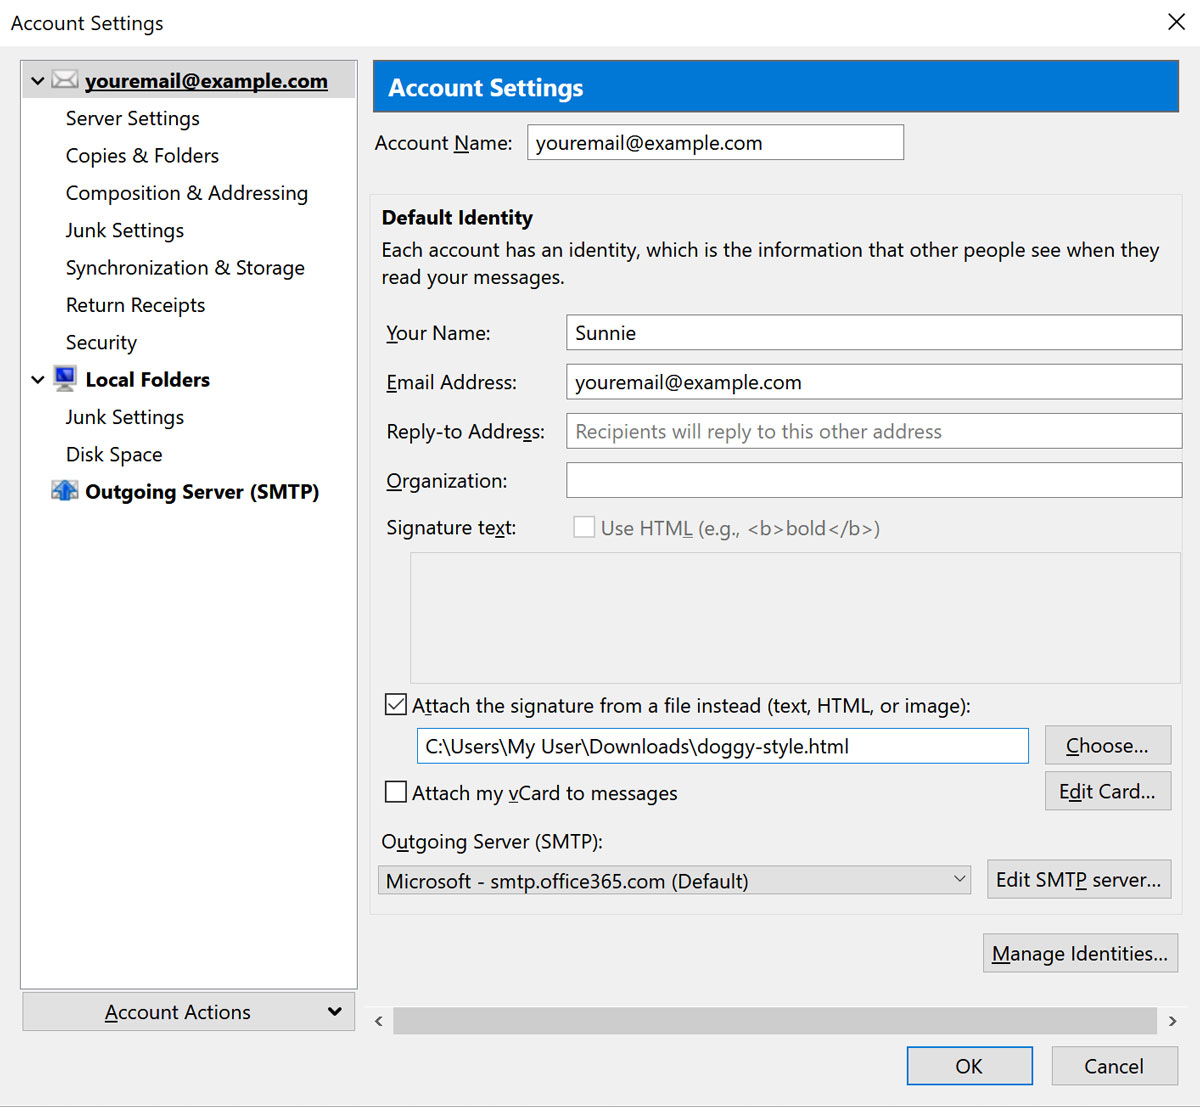
With the Mozilla Thunderbird application open, click the Menu Icon in the top right, then under Options select Account Settings.
From the Account Settings pop-up, click the Attach the signature from a file instead (text, HTML, or image) checkbox and choose the HTML signature you exported from Emailify (
index.html) for the file input below.

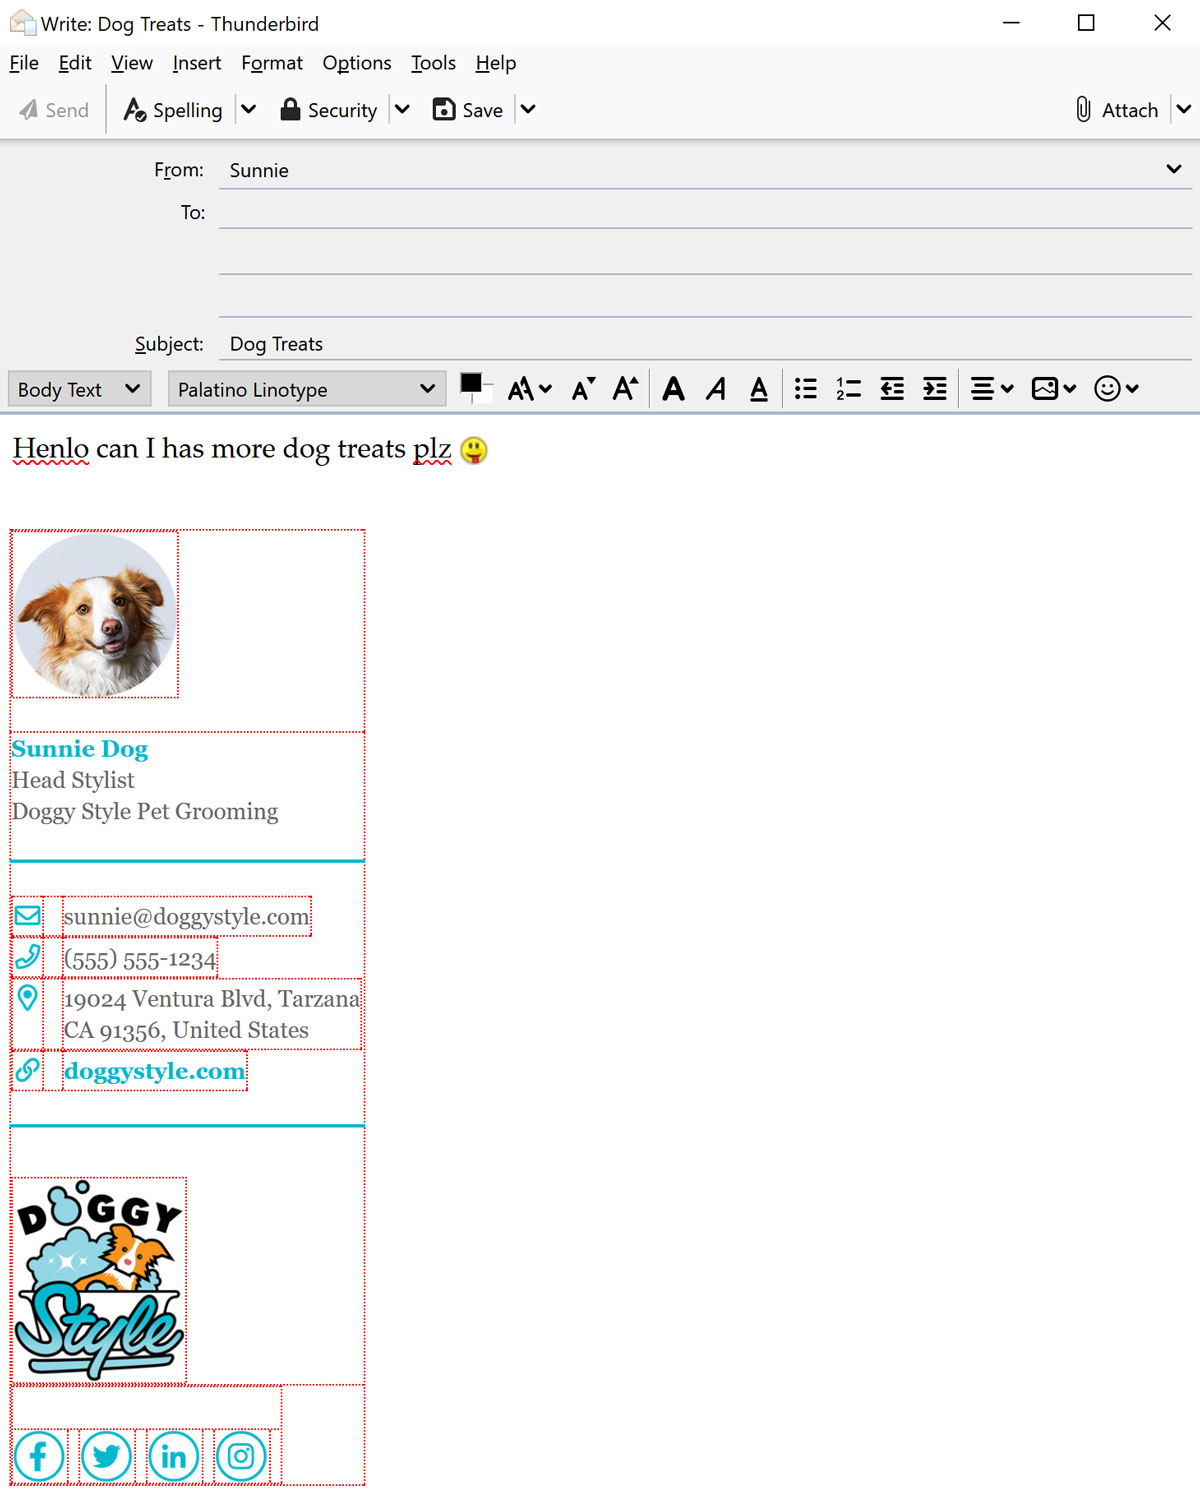
- Click OK in the bottom right of the popup, compose a new email and enjoy your new signature!
