 Video Tutorial: Design and export HTML Email Signatures from Figma
Export your HTML signature from Emailify
In the Emailify plugin, click on the Export HTML button to open the export panel, select the HTML Email Signature option from the dropdown list, then click the Export to HTML Signature button to start exporting the emails you've selected from Figma to HTML.
After Emailify has finished processing your email(s), you'll be shown a confirmation message; you can download your .zip file to your computer by clicking the Download your .zip file button, then you can unzip the .zip to see your exported files.
Copy your HTML email signature to the clipboard
After you've exported your HTML email signature from Emailify and unzipped the .zip file, you can open the preview-and-install.html file in your Google Chrome web browser (as other browsers like Safari may have issues) and then click the Copy HTML Signature button on the preview page, which will automatically copy the contents of your HTML signature to your clipboard.
How to install your HTML email signature in eM Client (Windows)

With the Em Client application open, click Menu in the top left of the window (next to the logo), then under the Tools option click the Settings link.
From the Settings pop-up, click theMail tab, and then click the Templates and Signatures sub tab.
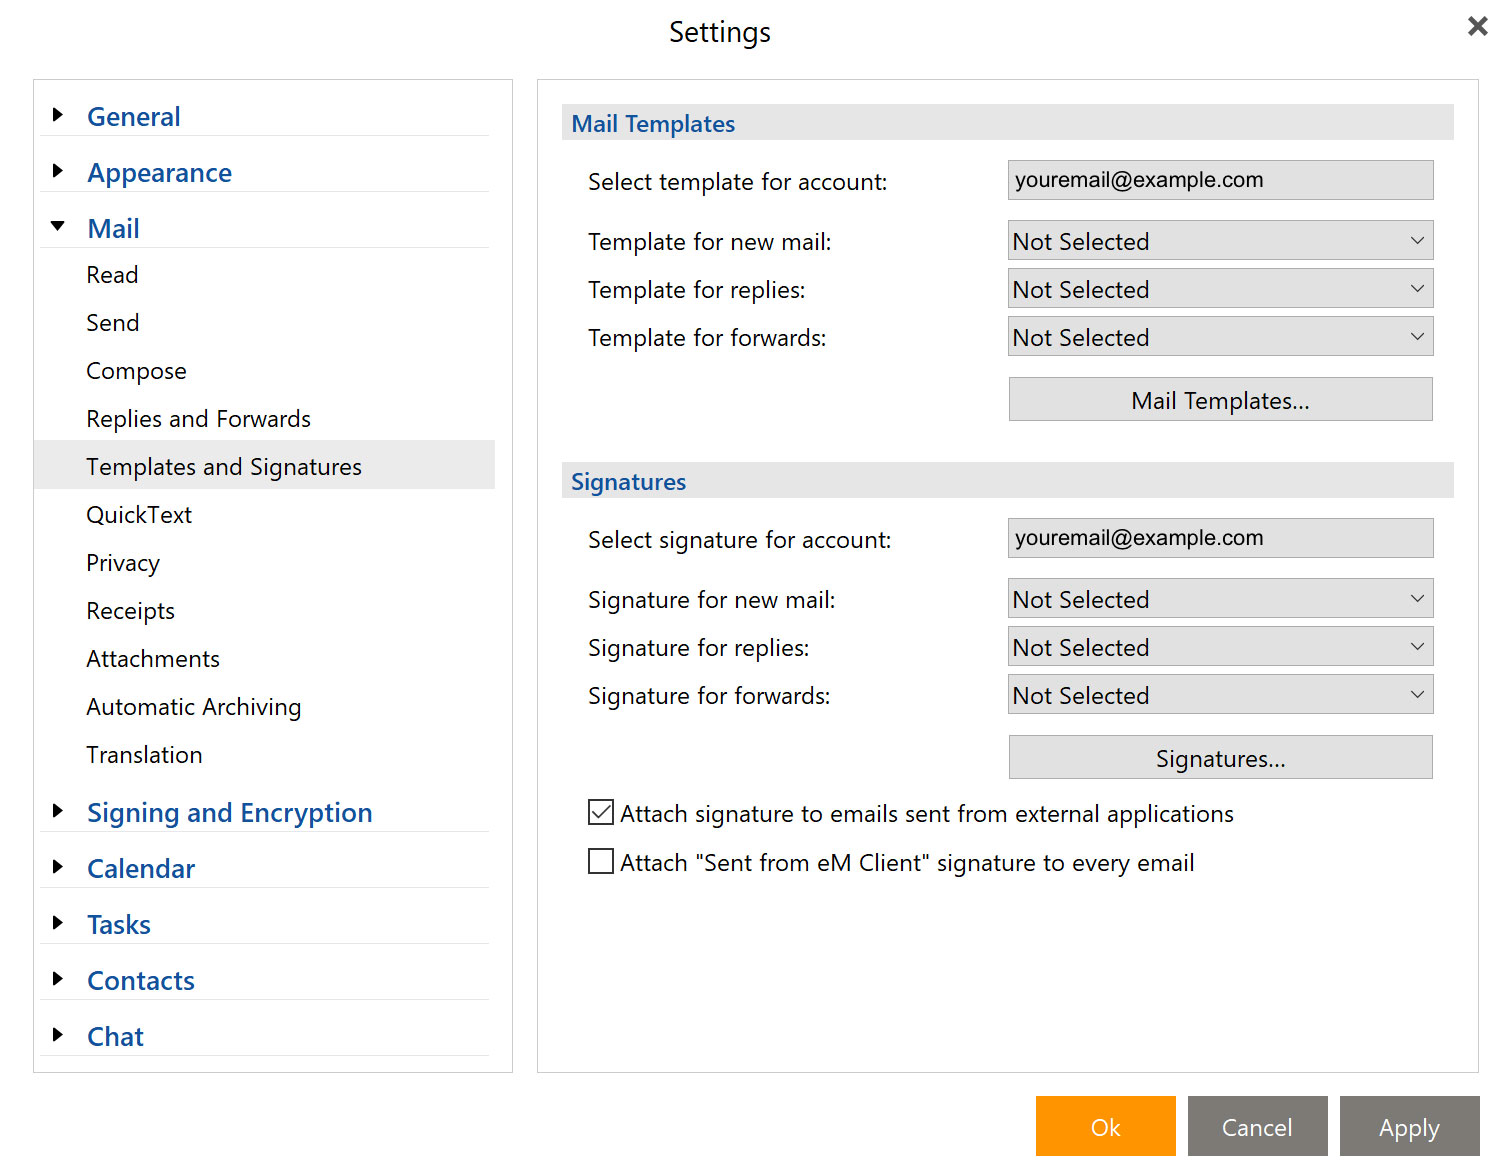
Click the Signatures... button
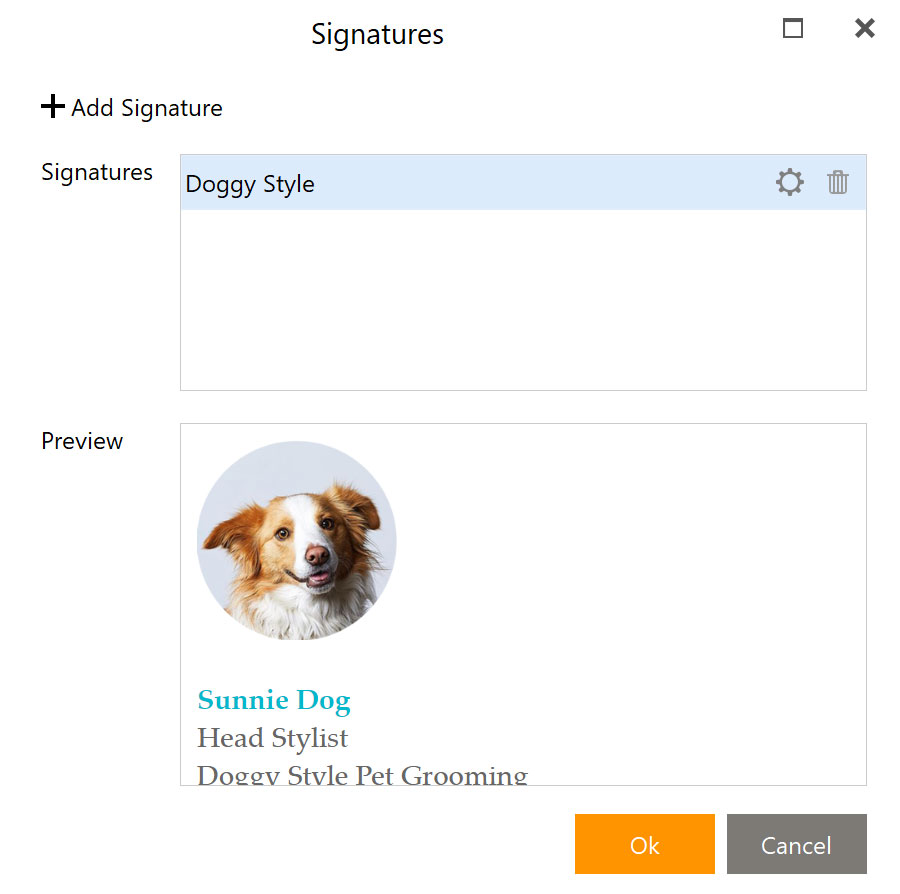
From the Signatures pop-up click Add Signature.
Give your signature a name and copy and paste your signature into the editor.
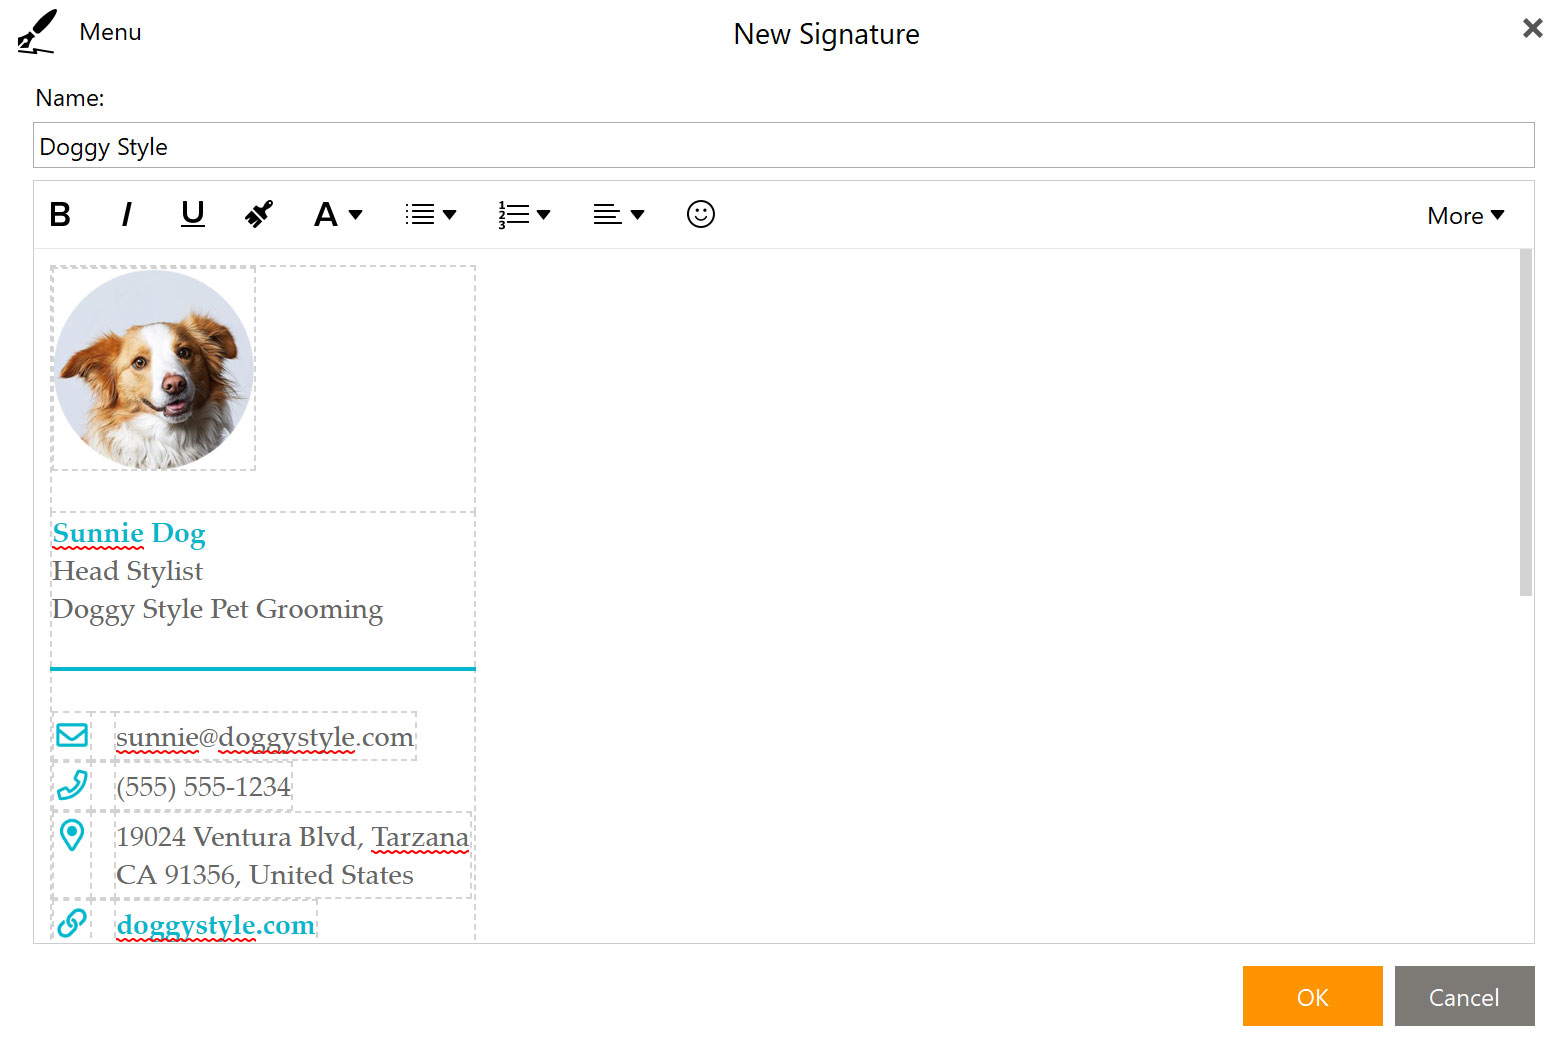
Click OK to save your signature.
Ensure your signature now appears in the Signature pop-up and click OK again.
- Select your new signature for the following options.
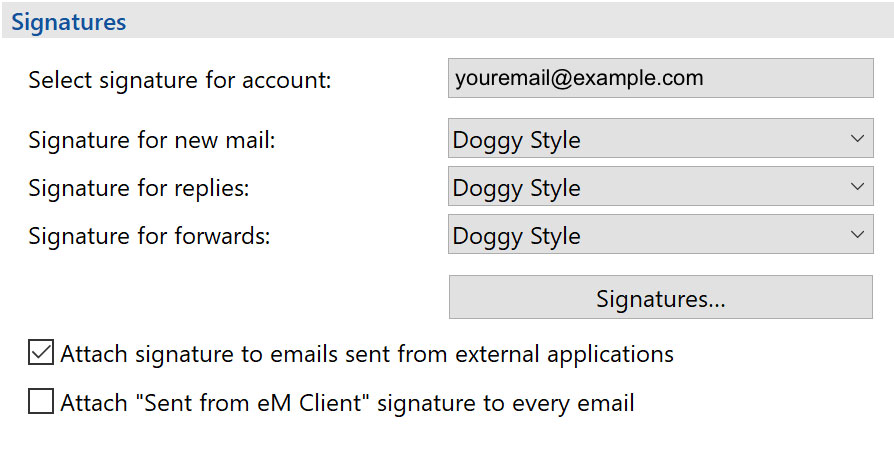
Click Apply to save your changes and then OK to close to Settings pop-up.
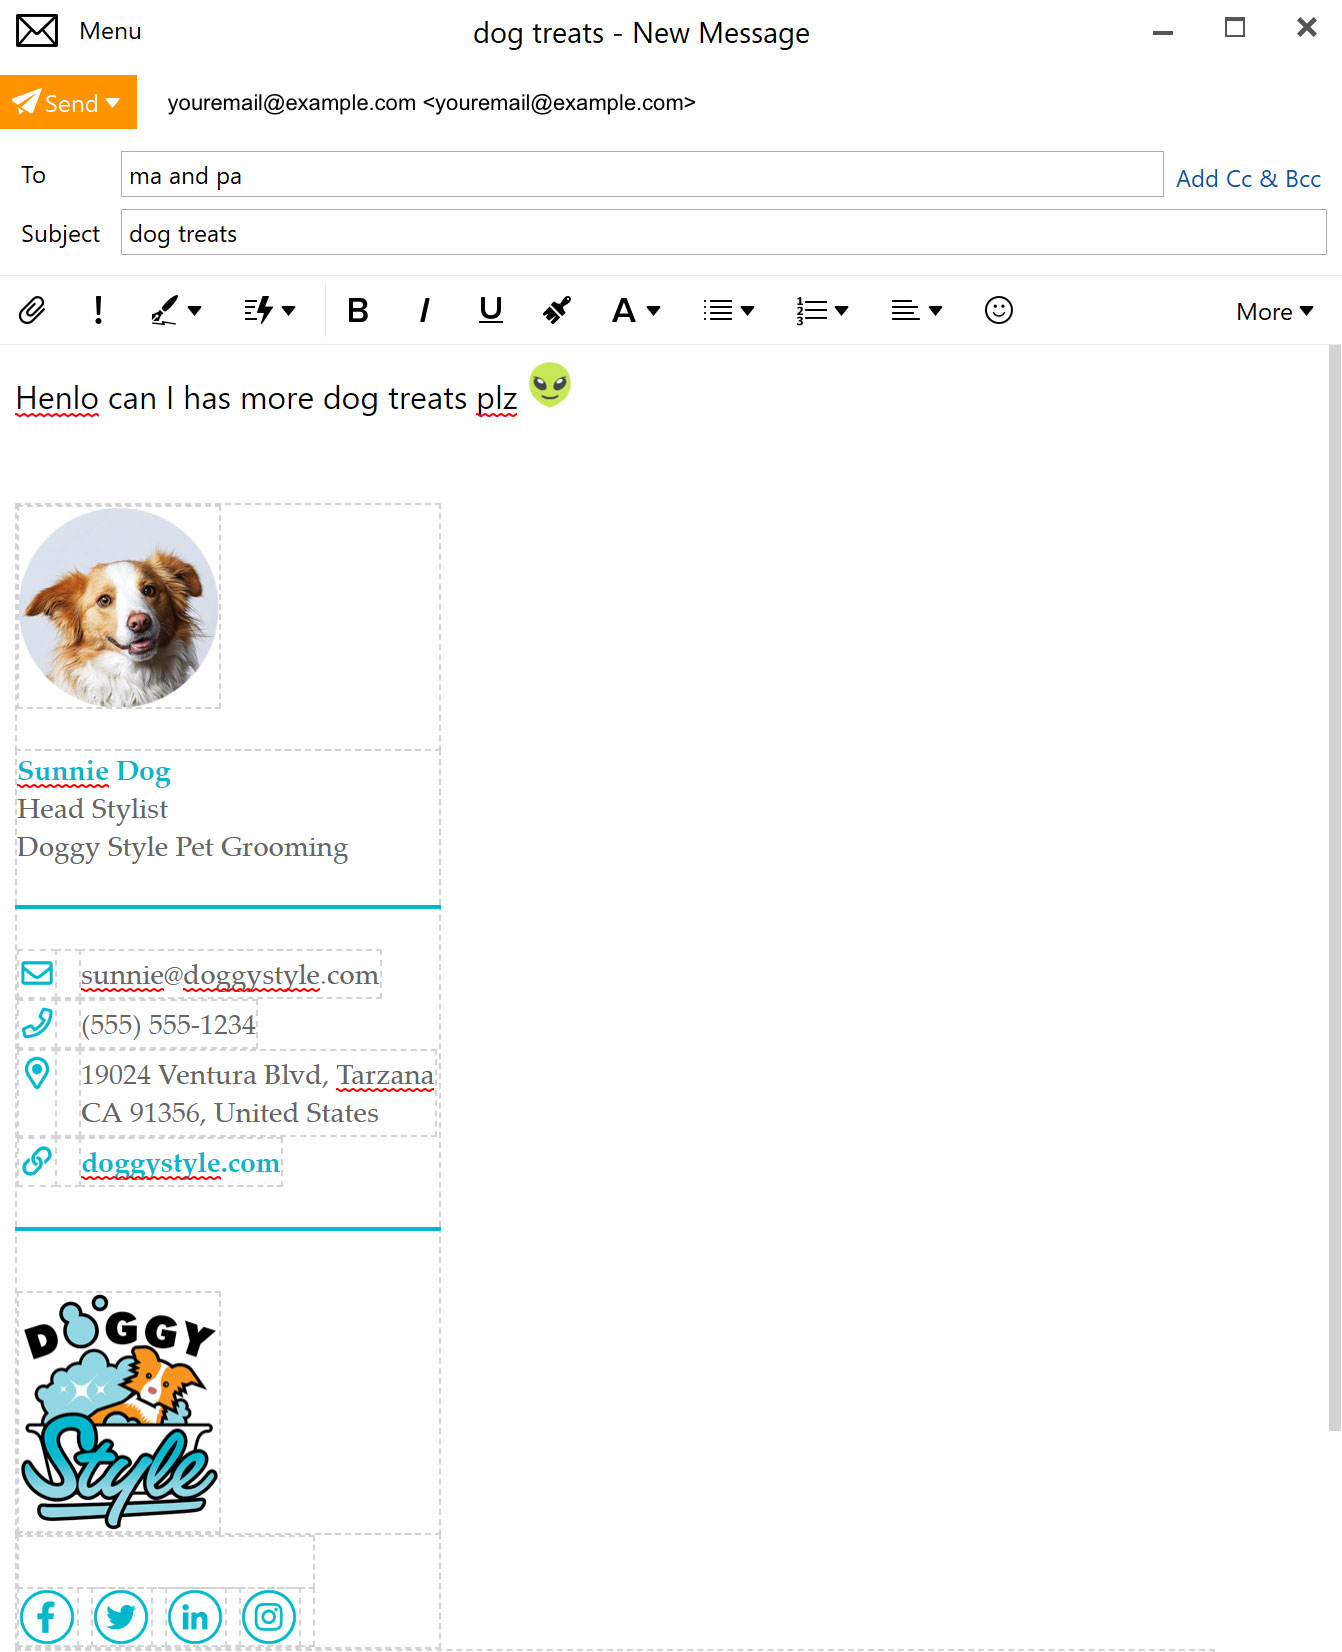
Compose a new email and enjoy your new signature!
