Email signatures have a size limit of 10,000 characters in the HTML. The plugin will warn you after exporting your email signature if its over the size limit. To avoid this you can use some of the Signature starter components under the Footer tab in the Emailify plugin.
Unfortunately, any responsive mobile overrides won't be rendered for any "HTML Email Signature" exports, as any CSS style tags and @media queries are stripped out by email clients (therefore, it's also not included in the code export), so it's worth trying to strike a balance in the original design that looks nice across both desktop and mobile widths.
 Video Tutorial: Design and export HTML Email Signatures from Figma
This video walks through how to design and export production-ready, responsive HTML email from Figma using the Emailify plugin.
Export your HTML signature from Emailify
In the Emailify plugin, click on the Export HTML button to open the export panel, select the HTML Email Signature option from the dropdown list, then click the Export to HTML Signature button to start exporting the emails you've selected from Figma to HTML.
After Emailify has finished processing your email(s), you'll be shown a confirmation message; you can download your .zip file to your computer by clicking the Download your .zip file button, then you can unzip the .zip to see your exported files.
Copy your HTML email signature to the clipboard
After you've exported your HTML email signature from Emailify and unzipped the .zip file, you can open the preview-and-install.html file in your Google Chrome web browser (as other browsers like Safari may have issues) and then click the Copy HTML Signature button on the preview page, which will automatically copy the contents of your HTML signature to your clipboard.
Some email clients may require the "raw" HTML code, so if that's the case, you can click the Copy HTML Signature (Raw Code) button in the preview-and-install.html file to copy the selection as raw HTML to your clipboard that way instead.
Once you've copied the HTML to your clipboard, you can follow the instructions below (taken from the excellent guides provided by SignatureHound) to install the signature in your email client.
How to install your HTML email signature in Apple Mail (MacOS)

With the Mail application open, click Mail and then Preferences in the top left corner of your screen.
From the preferences pop-up, click the Signatures tab.
Click the + button at the bottom of the middle column.
Copy and paste your new email signature into the right-hand column and close the pop-up window to save.
Images appear blank in this preview, but they load when you compose an email.
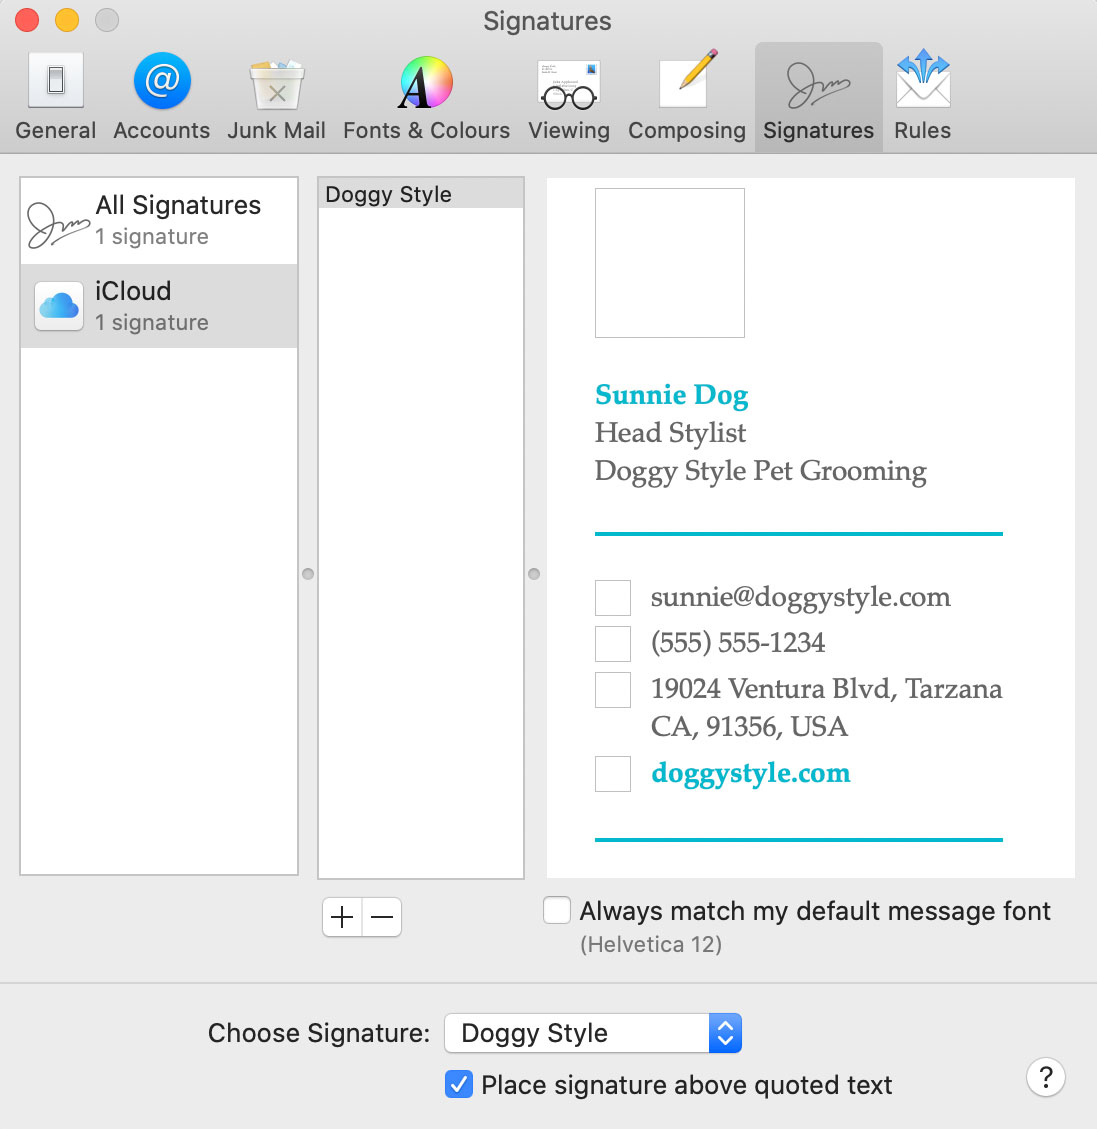
Ensure that Always match my default message font is unchecked, otherwise your signature will appear in plain text.
Still seeing a plain text version? Try toggling the Place signature above quoted text checkbox and pasting in your signature again.
Select your new signature in the Choose Signature field near the bottom of the pop-up.
Close the Preferences pop-up, compose a new email and enjoy your new signature!
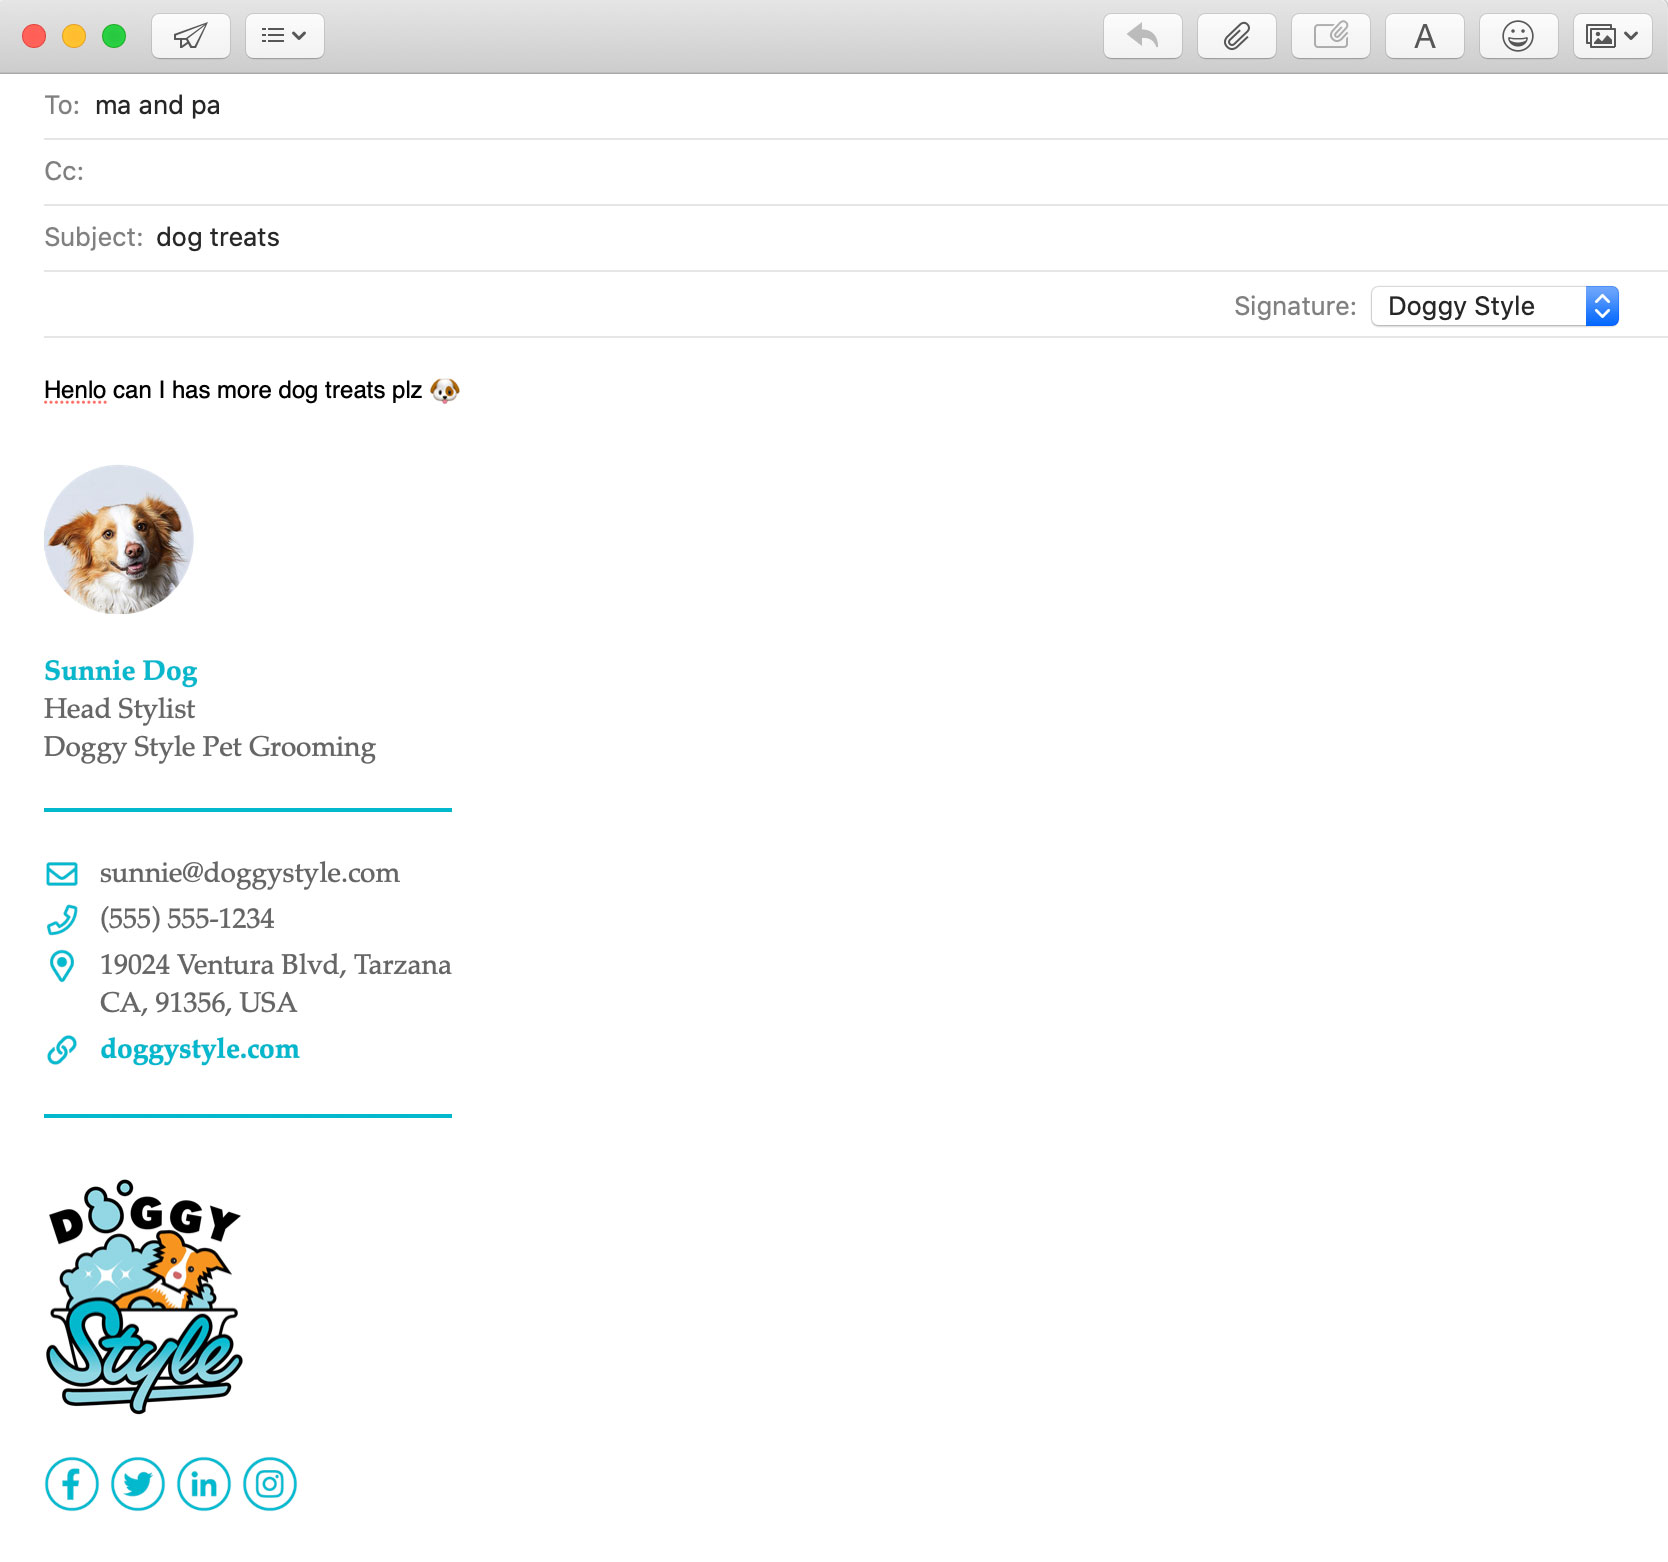
Images not appearing when you compose an email? Go to your Privacy settings and ensure that Block All Remote Content is unchecked.
When using Apple Mail in dark mode, it has a quirk where it will display a white background behind your signature in the "Inbox" panel (even if both the system and Mail settings are set to dark mode) if any retina images are being used in the signature. If the images are exported at a native 1x (instead of 2x retina) and not resized down etc, then it will remove the white background, but this is at the cost of having blurry/fuzzy images in the signature.