 Video Tutorial: Uploading your emails to Customer.io
This video tutorial is a complete step-by-step guide showing you how to manually upload HTML emails from the Figma Emailify plugin to Customer.io.
Emailify includes two Customer.io export options:
- Customer.io (API) uploads your emails directly to Customer.io Design Studio as emails or reusable email templates.
- Customer.io (Zip) exports a ZIP file that you can manually copy into Customer.io.
Uploading directly to Customer.io Design Studio
In the Emailify export panel, select the Customer.io (API) option from the dropdown list, then paste in a valid Customer.io App API Key and choose the matching Customer.io region for your workspace.
If your Customer.io workspace is hosted in the EU, choose the EU region in Emailify. Otherwise, keep the default US region selected.
Use the Upload As setting to choose whether Emailify creates reusable email templates or regular Design Studio emails in Customer.io. This defaults to Template for backwards compatibility. When you're ready, click the Upload To Customer.io button to start exporting the emails you've selected from Figma to HTML, and have them automatically uploaded to Customer.io Design Studio.
You’ll need a Customer.io App API key that can create Design Studio emails in your Customer.io workspace.
When uploading via the Customer.io API, Emailify uploads supported email images to Customer.io Assets by default. It will use an emailify folder in Customer.io Assets, creating that folder automatically if it does not already exist. Images that Customer.io Assets cannot accept, including images over Customer.io's 2 MB file limit, are uploaded to Hypermatic as a fallback so the Design Studio email or template can still reference a hosted image URL.
Updating Customer.io emails and templates uploaded from Emailify
If you'd like to have your Customer.io emails or templates automatically update instead of being created as new items each time, you can optionally enable the Enable Updatable Templates toggle in the plugin's export settings (or Enable Updatable Emails when the Upload As setting is set to Email).
This will automatically append a customerioEmailId or customerioTemplateId value to the Figma frame's layer name that was uploaded, and then re-use that ID when the same frame is re-uploaded to Customer.io via the API upon the next export from the plugin.
Please note, you will need to ensure the Enable Updatable Templates or Enable Updatable Emails toggle is also enabled prior to uploading your initial email or template, as this will append the original Customer.io email or template ID into your Figma frame name; this ID will then be used for any future re-uploads to update that same item in your Customer.io account (instead of creating a new one each time), provided that the updatable toggle remains enabled, too.
To update emails or templates in Customer.io, you’ll need to use an App API key for the same Customer.io workspace and region that originally received the upload.
Manually uploading a ZIP export to Customer.io
In the Emailify export panel, select the Customer.io (Zip) option from the dropdown list, then when you're ready, click the Export For Customer.io button to start exporting the emails you've selected from Figma to HTML.
Once the export is finished, download the .zip file to your computer and unzip it, then open the index.html file inside the folder with your email name in a code/text editor and copy all the HTML in the file, then:
- Login to your Customer.io account
- Expand the Content menu item in the admin navigation
- Then click the Email Layouts menu item
- Click the Create Layout button
- Click the Start from scratch option
- Name your layout and click Create Layout.
- Paste your copied HTML from the exported index.html file into the Edit tab editor.
- Click the Save changes button.
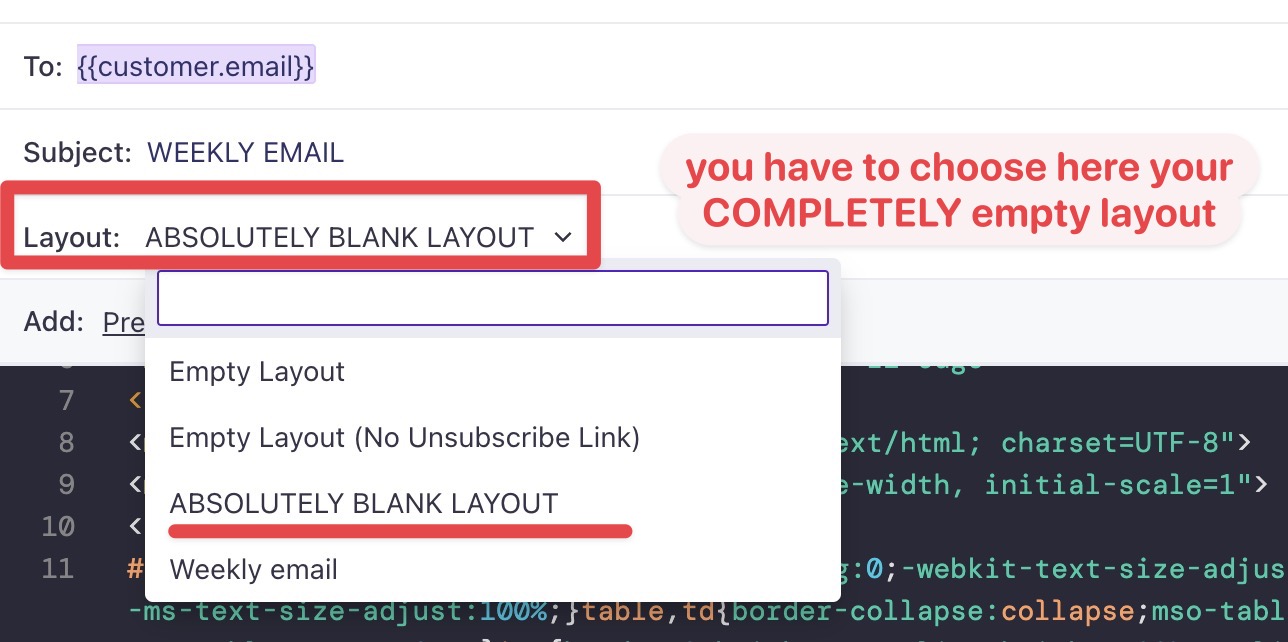
Creating a totally blank layout in Customer.io
Make sure you're using a totally blank layout! By default, Customer.io will automatically add its own extra HTML tags (eg. head, body, etc) to any new layout created; you'll need to ensure that this code is removed, otherwise your HTML template will look broken when it's sent out.
In Customer.io, when you start creating an email, you'll need to select a Layout, and this needs to be totally blank, so that your own custom HTML template is the only thing that gets rendered.
As you can see in the screenshot below, selecting a Layout that looks blank, isn't actually blank (as it has those <html> tags automatically included and wrapping around your HTML template content)
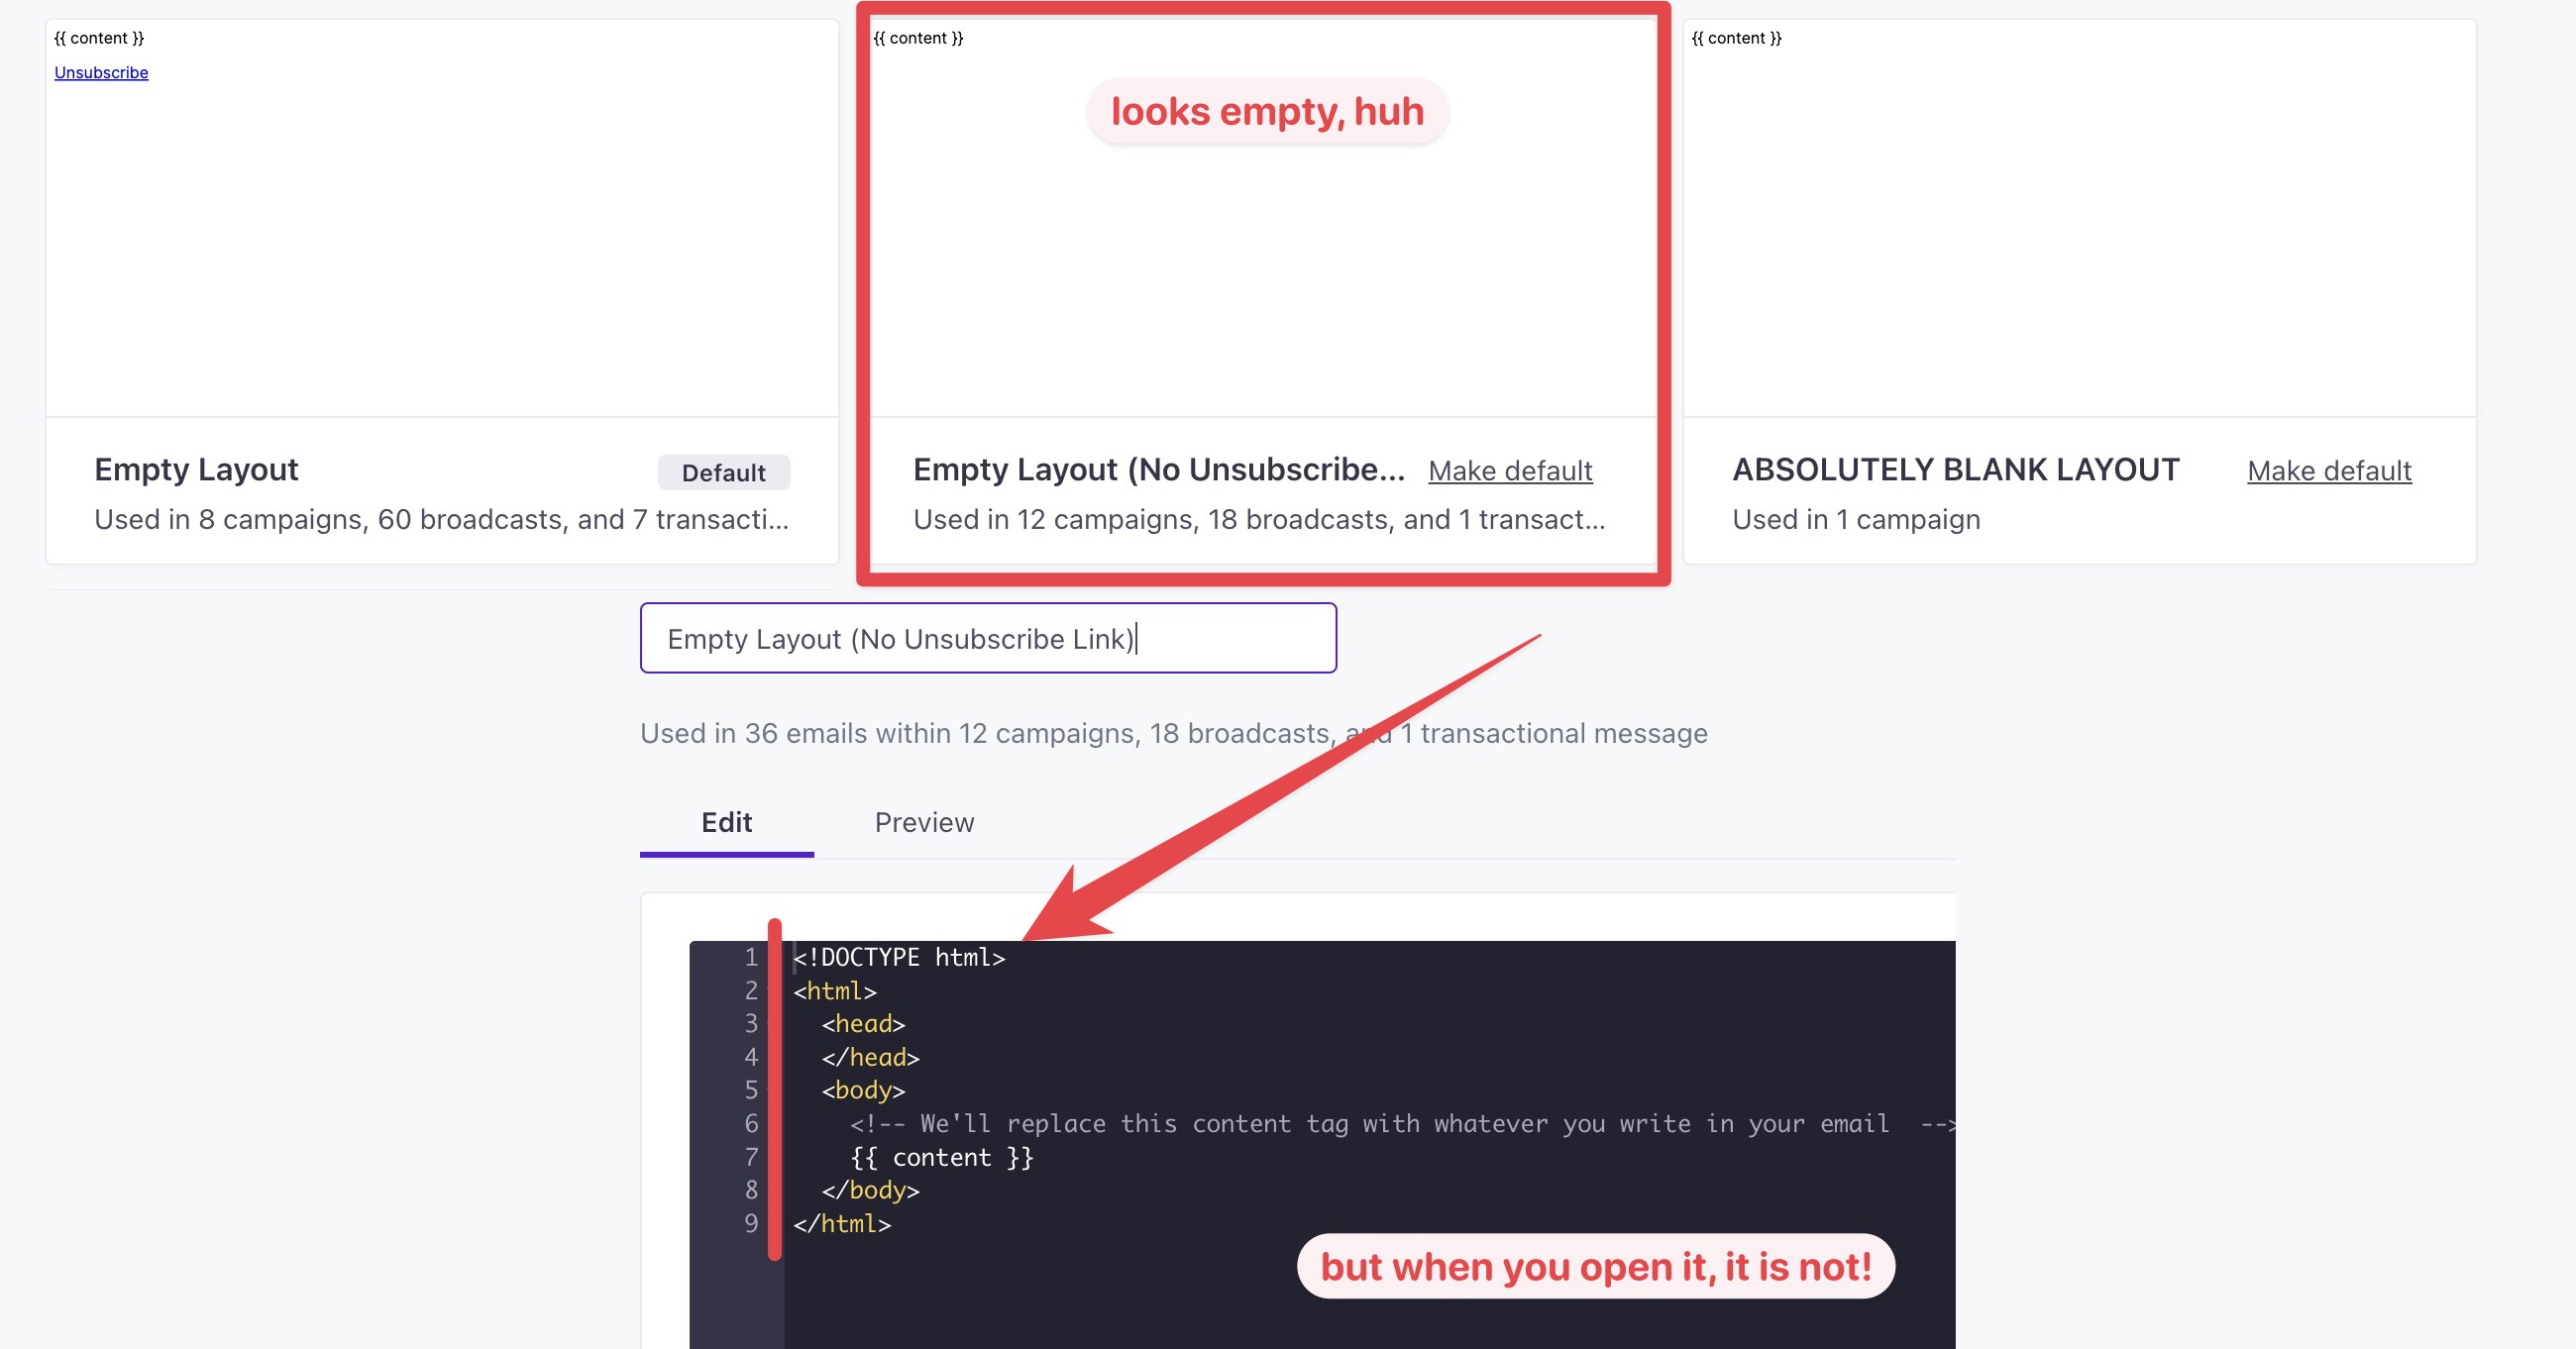
To fix this, you'll need to manually remove any HTML that Customer.io adds to your blank Layout, and only leave the content tag (below).
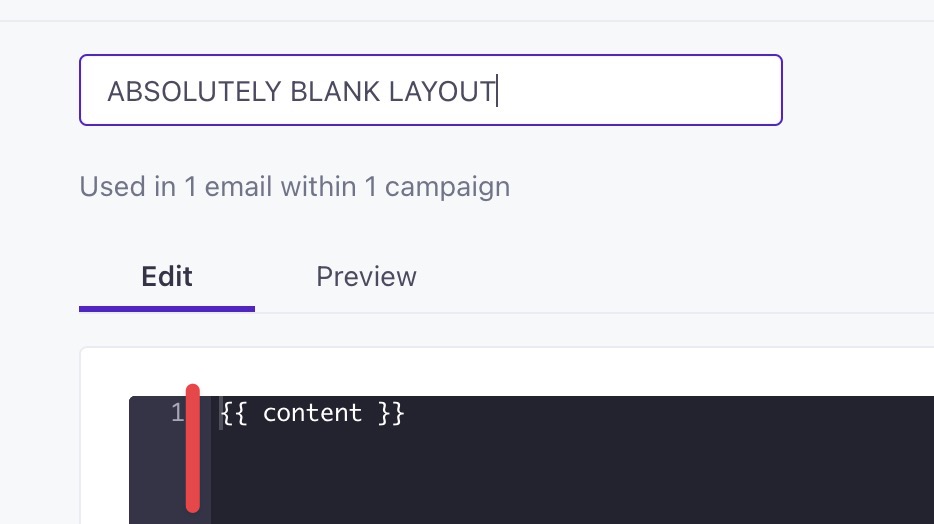
After the Layout has been saved and only contains the content tag, your custom HTML template should render as expected.